
While a DIY wooden sink may not be the first thing that comes to mind when planning a bathroom renovation, with some basic materials and skills, you can create a unique piece without breaking the bank. The carving style of this finished sink resembles hand-chiseled craftsmanship typically sold for hundreds at high-end shops. We’ll guide you through the process of creating this unusual sink, which, although large for a home, can be adapted to fit in a guest bathroom with some simple adjustments.
For those new to woodworking, starting with a rectangular, shallow basin design is a great way to build confidence before tackling more complex projects. With patience and attention to detail, you’ll not only have a beautiful sink but also develop a valuable skill that can be applied to other DIY endeavors.
Materials
When it comes to building your own sink, the type of wood you choose can make all the difference. For this project, three pieces of reclaimed oak were used, providing a unique and rustic touch. Alternatively, mahogany could be a great option to consider. However, it’s essential to ensure that all the wood has properly dried to avoid any issues during construction.
In addition to choosing the right type of wood, you’ll also need to select the correct number of tiles for your basin’s design.
The specific number will depend on the unique features of your sink.
The drain body is another crucial component to consider. Since this sink is designed for an external faucet and levers, it’s vital to choose a drain body that matches the diameter of your drain pipe. This will ensure a seamless integration and prevent any leaks or other issues from arising.
When it comes to bonding the different components together, you’ll need a strong adhesive like a heavy-duty multi-use construction adhesive. Additionally, epoxy resin can be used to provide an extra layer of protection and durability. Finally, when it comes to finishing touches, consider using car lacquer, which offers a choice between urethane and polyurethane. While both options are viable, polyurethane is generally considered more durable.
Tools
To complete various woodworking projects, having the right tools is essential. A circular saw, angle grinder, and belt sander are staples in any woodworker’s arsenal. The angle grinder can be used with different grinding discs for both wood and tile. For finer details and precision, a drill with a Forstner bit is necessary. Additionally, tile nippers (if needed) can help shape ceramic tiles to fit perfectly into place.
For more serious woodworking tasks, an aerator mask is recommended when applying car lacquer to ensure proper ventilation. Caulking gun and clamps are also important for ensuring joints are sealed and held firmly in place.
Plane Your Wood
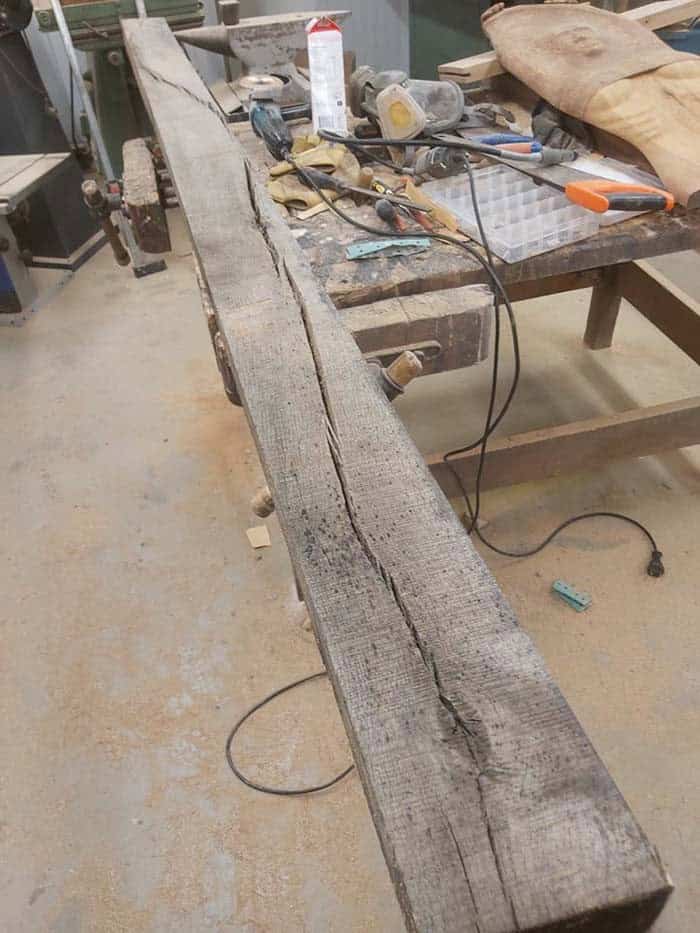
When designing your tile pattern for a bathroom vanity, the amount of wood needed is directly influenced by the size of the vanity itself. To make the process easier, it’s recommended to keep the wood supply on the smaller side, allowing for a more manageable and precise fit. In terms of specific measurements, round bathroom basins typically range in diameter from 16 to 20 inches, providing a consistent foundation for your tile pattern.
Rectangular sinks, on the other hand, vary in size, measuring between 16 to 23 inches from front to back and 19 to 24 inches wide. Given that you’ll be relying on adhesive to secure all the pieces together, a rough match is sufficient, rather than striving for a precise fit.
Fill Any Gaps in the Wood with Epoxy Resin
When it comes to reinforcing the natural beauty of wood, epoxy resin stands out as a reliable and effective bonding agent. Its ability to seamlessly cover imperfections in wooden surfaces makes it an attractive alternative to traditional wood fillers. The vibrant blue river design, in particular, is a timeless classic that can add a touch of modern sophistication to any woodworking project.
As the resin cures, patience is key – allowing it to fully set before proceeding with the next step ensures a strong and lasting bond.
Glue Together Your Wood Pieces
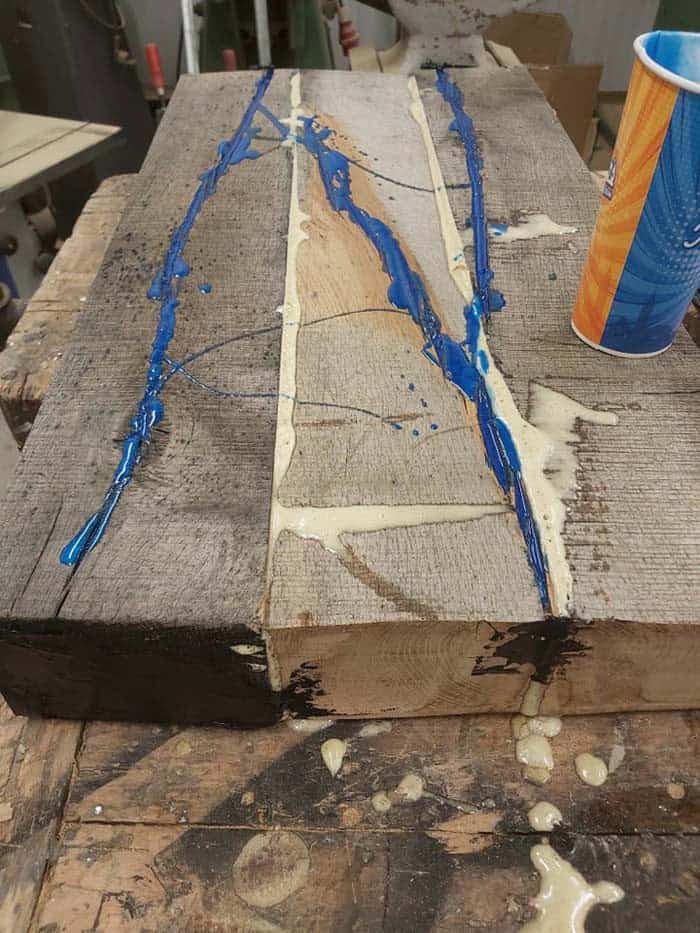
When it comes to joining wooden components, a reliable adhesive plays a crucial role. Specifically, a multi-purpose construction adhesive is an excellent choice for bonding wood pieces together. To achieve a strong bond, apply the adhesive evenly and clamp the wood pieces together securely. Allow the mixture to dry completely before handling or moving on with your project.
Saw a Basic Form
To streamline the installation process, utilize your circular saw to reduce the countertop material to the required size for a precise fit on your vanity. This initial cut also serves as an opportunity to verify that the basin will accommodate the faucet when installed. If necessary, employ a planer or band saw to refine the height of the countertop to ensure a seamless installation.
Start Sanding
While it may seem like a tedious process, sanding is an essential step in preparing your project for finishing. To achieve the desired results, focus on removing the majority of the surface material, rather than striving for perfection. Aim for a smooth finish that will provide a solid foundation for any subsequent coatings or treatments.
Sketch Your Design
When creating your sink design, start by sketching out its overall shape, making sure to include a circular or rectangular drain hole in the correct location. Additionally, consider the height of your sink’s basin and leave enough space at the top for a faucet to extend over it without obstruction. Also, take note of the distance from the back wall to ensure proper alignment with any surrounding cabinetry or countertops.
Drill a Hole For the Drain
To complete the installation of your sink drain, start by utilizing a drill fitted with a Forstner bit. This specialized bit is designed to produce a precise and clean hole for the drain body. As you drill, ensure the bit remains perpendicular to the surface to avoid any misalignment or irregularities that could impact the overall performance and functionality of the drain.
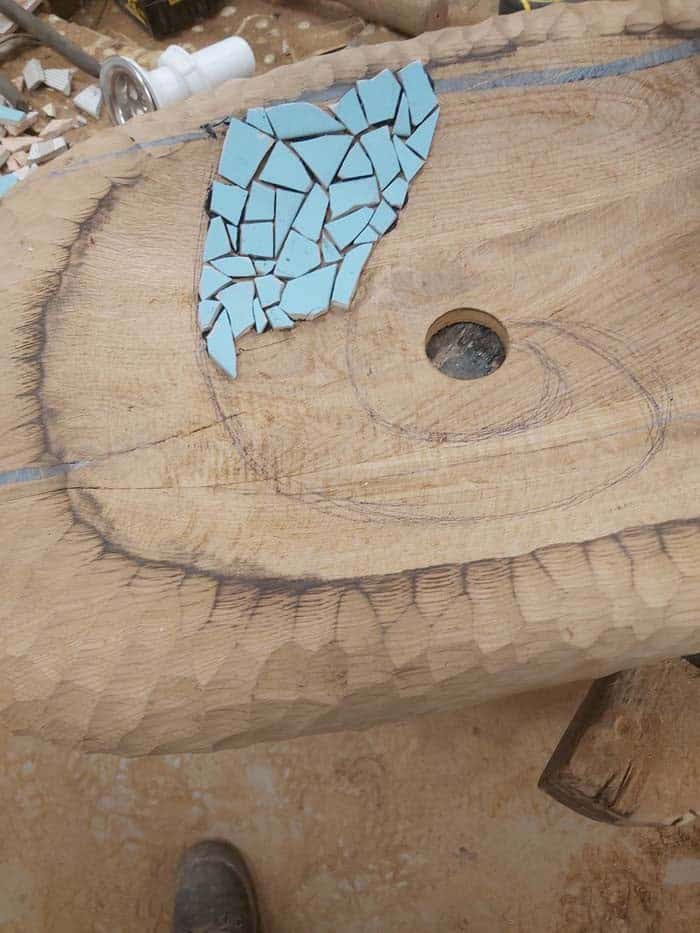
Rout Out the Basin
When tackling a sink refinishing project, it’s essential to utilize your angle grinder with a wood disc attachment to achieve optimal results. To ensure even coverage and prevent unevenness, work in small sections, maintaining a consistent depth level from one side of the basin to the other. The average depth of most sink basins typically ranges between 5 to 8 inches, as illustrated by the 5.9-inch example provided.
Carve the Outside Design
To achieve this high-end finish, start by utilizing a belt sander for the main process. As you work on the carvings, it’s essential to be patient and allow the pieces to dry and the epoxy to cure. Once these steps are complete, take the time to manually smooth out the surfaces using 400 grit sandpaper. For more intricate areas, consider employing a corner/detail sander for added precision.
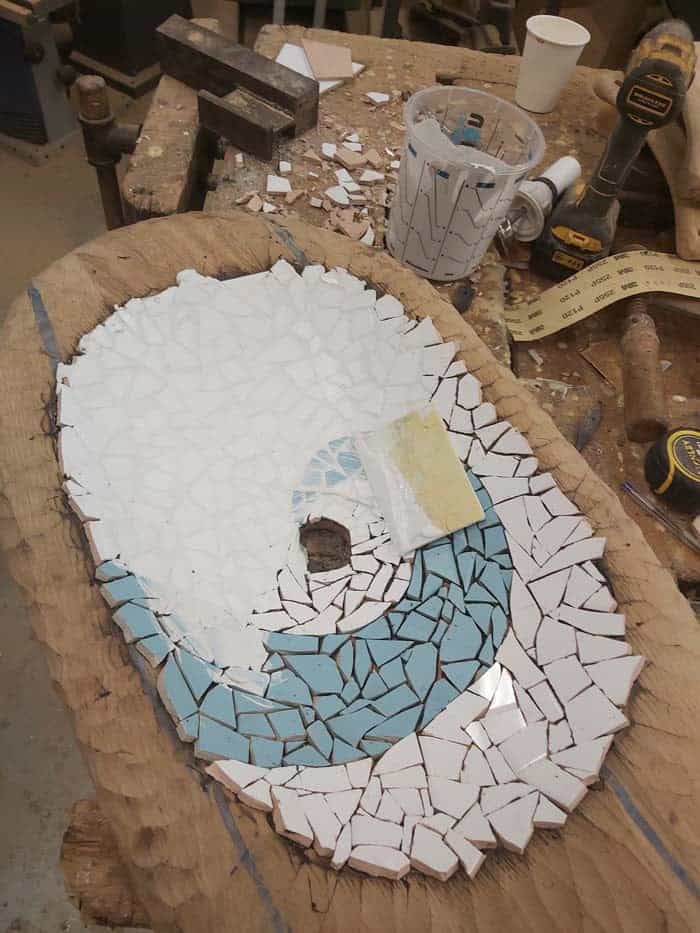
Draw Your Mosaic Design
Glue the Tiles in Place
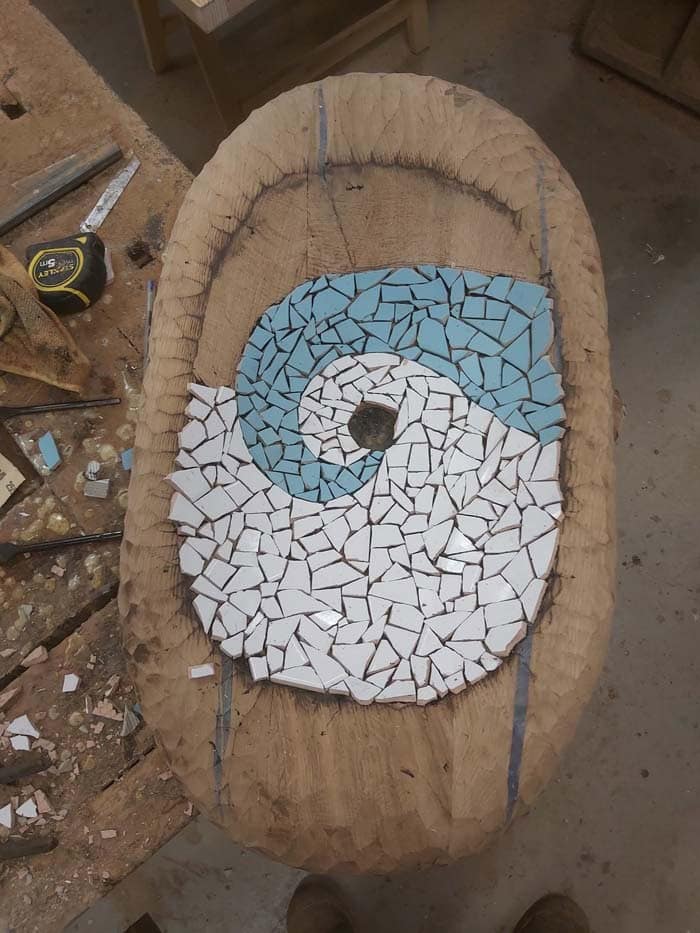
To prevent unsightly gaps and achieve a seamless finish, consider employing a tile nipper to cut tiles to size. This versatile tool also enables you to create a rounded edge at the top of the basin for a more polished look. For added precision and control, you can opt to use an angle grinder equipped with a tile saw blade to trim any excess material.
When it comes to sealing the joints, we highly recommend utilizing Sika Sikaflex-221 multi-purpose sealant/adhesive, which offers the added benefit of being sandable for a smooth finish.
Caulk the Tiles
Once you’ve successfully attached the tiles, it’s time to focus on filling any remaining gaps between them. To do this, simply apply a small amount of additional adhesive and gently spread it evenly across the surface. Once dry, take a fine-grit sandpaper and smooth out the outer edge, ensuring a seamless finish.
Set In the Drain Body

Stain and Finish With Car Lacquer

To prepare the basin for installation, cover any surrounding wood with painter’s tape. If you’re looking to add a touch of color, consider staining the wood with an oil-based stain. Next, apply two to three coats of car lacquer, ensuring a smooth and weatherproof finish. While some auto shops may recommend furniture lacquer, it’s essential to note that car lacquer is specifically designed for outdoor use and can withstand harsh conditions.
In fact, car lacquer is often used as the topcoat on electric guitars to achieve a high-gloss finish. As an alternative, if car lacquer is unavailable, you can opt for marine-grade polyurethane instead. Once the protective coatings have had time to cure according to the manufacturer’s instructions, your sink is ready to be installed.
The Finished Project!
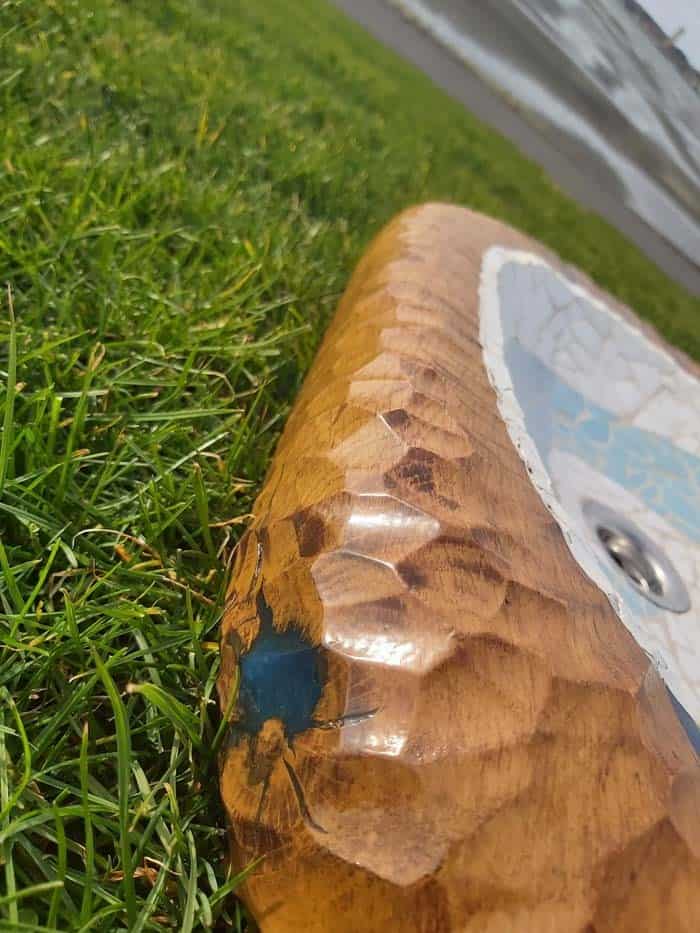
As you prepare to install your unique wooden sink, take a moment to appreciate the intricate details that make it truly special. The carvings, resin filler, and mosaic edging all come together to create a one-of-a-kind masterpiece. To get a closer look at these striking features, we’ve included an additional photo for your viewing pleasure.
We’re also grateful to Dimitar Dochev for sharing his beautiful DIY wooden sink project with us, which has inspired countless others to try their hand at creating something truly remarkable.