Hardscape pathways bring shape, decorative appeal, and practicality to vegetable gardens and landscapes. They invite exploration among plants, whether for tasks like weeding, harvesting, or simply appreciating the sensory experiences they offer. Formal paths crafted from stepping stones, paving, wood, or gravel enable effortless navigation while preserving plant root zones from damage.
With muddy shoes a thing of the past, homeowners can now focus on crafting their own unique hardscape designs without relying on professional landscaping crews. In fact, 12 DIY projects below showcase the vast possibilities for homeowners looking to elevate their gardens with visually striking and functional pathways. From elaborate patio-path combinations to simple yet elegant concrete staircases, these tutorials demonstrate the diverse range of creative options available.
Lace Stepping Stones
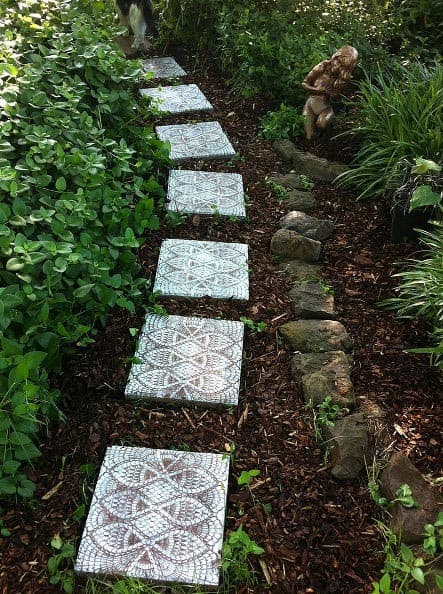
What sets this DIY project apart is its creative approach to upcycling plain concrete pavers. By using a lacy plastic doily as a stencil, Karen transformed them into unique and charming decorative elements. This project’s simplicity and effectiveness make it an excellent example of repurposing materials in innovative ways.
To achieve this look, you’ll need concrete pavers, a lacy plastic doily, and some basic DIY supplies. Here’s how to get started:
1.
Begin by placing the doily over each paver, ensuring it covers the entire surface.
2. Spray paint the paver-doily combination with your desired color and finish.
3. To prevent spatters and make cleanup easier, place a cardboard frame around each paver before painting.
4. Once the paint is dry, apply a coat of exterior clear sealer to protect the design and ensure durability.
For added functionality and aesthetic appeal, consider laying the stones on a path of mulch.
This will not only discourage weeds from growing but also create a beautiful, natural-looking border. With these simple steps and a little creativity, you can turn plain concrete pavers into unique decorative elements that add character to any outdoor space.
Stenciled Stepping Stones
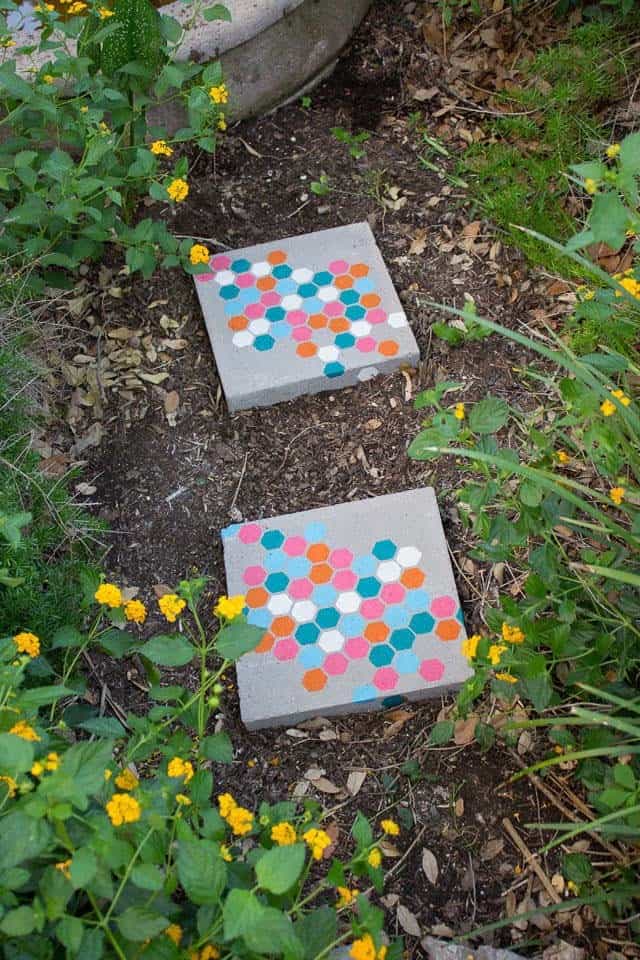
We’re drawn to Haely’s garden because of its unique charm, thanks to the vibrant pastels and one-of-a-kind stepping stones. The beauty lies in their distinctiveness – no two are identical. This whimsical touch adds character to an otherwise ordinary outdoor space.
To achieve this look on your own concrete pavers, you’ll need a few key tools: a commercial stencil with a repeating geometric pattern, and foam brushes for each color of weather-resistant acrylic craft paint.
Apply the paints in random patterns, one at a time. If you’re new to stenciling, consider opting for a stencil with thicker borders to prevent color overlap.
For a step-by-step guide on how to bring this look to life, head to Design Improvised.
Endless Circles Patio Pavers
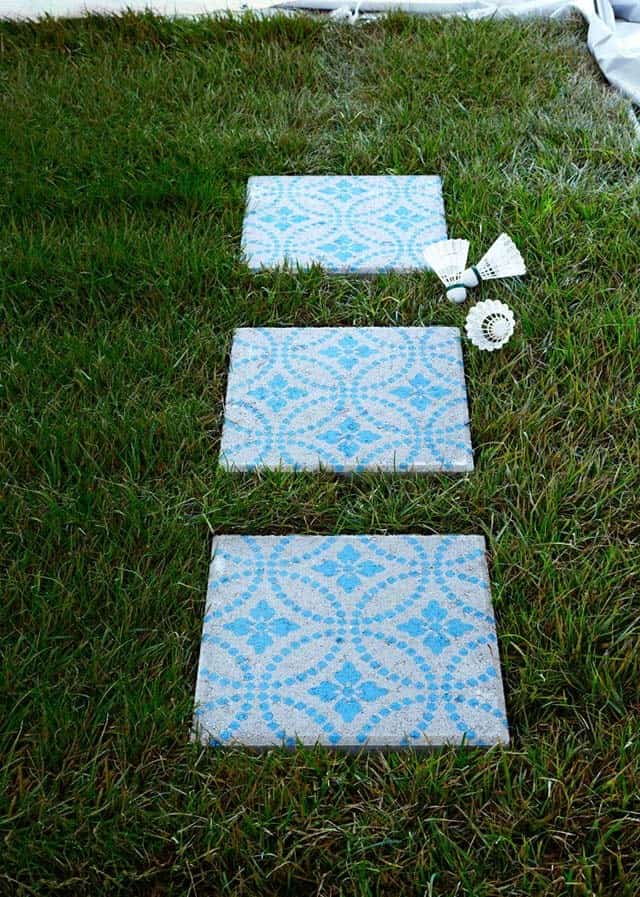
The allure of the Modern Masters “Endless Circles” stencil lies in its simplicity, as it features a beautiful sky blue floral pattern that exudes elegance. The DIY process is also straightforward, requiring minimal materials and steps.
To achieve this look, start by thoroughly cleaning concrete pavers to remove any debris. Then, position the stencil symmetrically on the surface before painting.
For the best results, use a stencil brush with straight up and down movements to apply the paint, as demonstrated by Country Living.
If you’re looking for more creative possibilities, we recommend exploring the vast palette of Annie Sloan chalk paint colors available on their website.
Source: Country Living
Patterned Stepping Stones
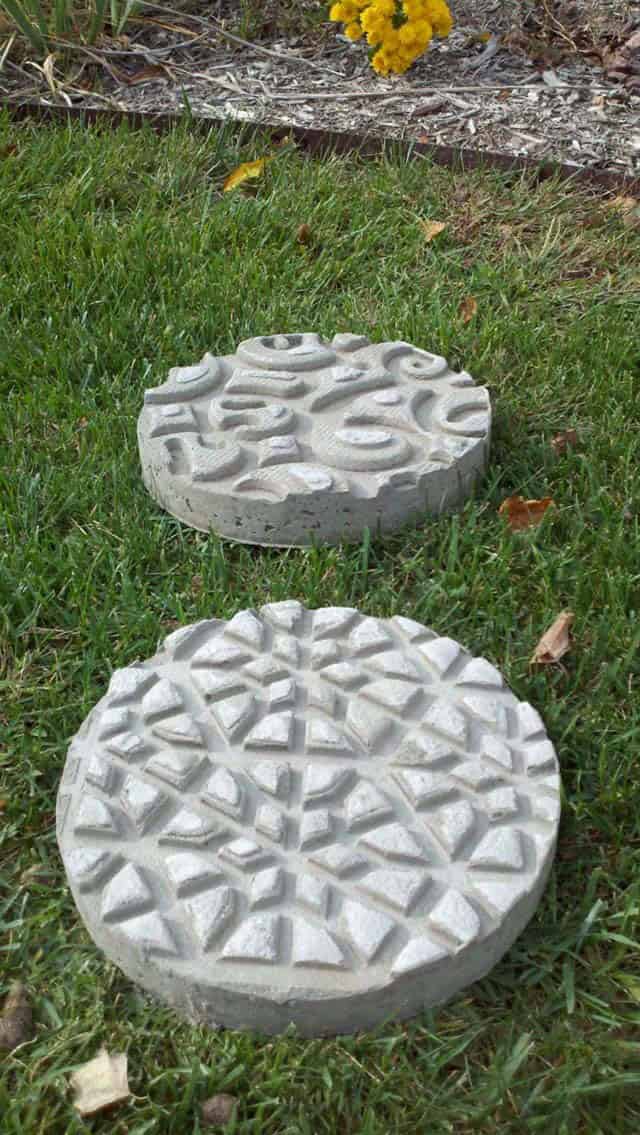
We appreciate this DIY project because it showcases creative problem-solving, leveraging open-work doormats to create unique patterns. The process of creating these stepping stones is equally impressive, thanks to the clever use of cardboard tubing frames and templates. Here’s how you can replicate this project: start by preparing your materials, including vegetable oil spray to prevent sticking. Next, let the concrete set for 45 minutes before applying the doormat circles.
Once hardened, carefully remove the doormat circles to reveal your finished stepping stones. To take it to the next level, consider placing them in a serpentine pattern to create an elaborate and visually appealing path. For a more detailed guide, visit The Mizelle Group’s full instructions.
Cake Pan Mosaic Stepping Stones
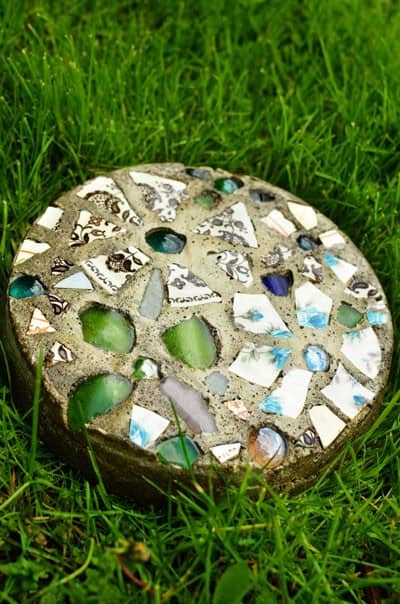
We adore this DIY project because it offers a unique way to upcycle ceramics, creating beautiful mosaics with glass jewels. To get started, put on your safety gear and cover the crockery with a cloth before breaking them into pieces with a hammer. A cake pan serves as both a frame for shaping the design and a tool for cutting out the right size circle of contact paper to use as a sticky base. Add some colorful glass jewels to give your mosaic extra flair.
To create the stone, line the sides of the cake pan with petroleum jelly before filling it half full with concrete. Place a square piece of chicken wire on top to reinforce the block, then fill the rest of the pan with concrete. After two days, flip the pan over to release the stone and remove the contact paper. For added protection while hammering, consider using an old pillowcase to hold your crockery in place.
Rock and Shell Stepping Stones
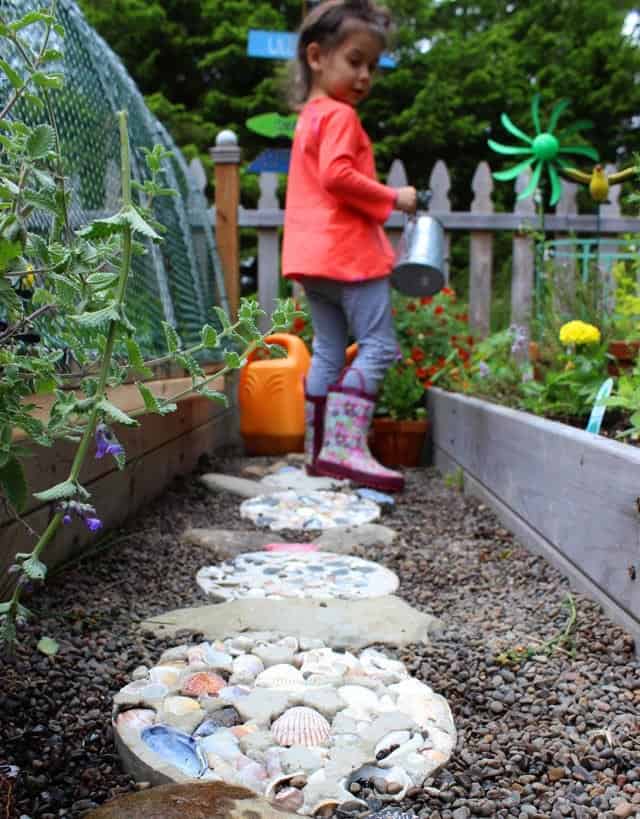
While our love for stepping stones stems from their ability to repurpose vacation treasures, the creative process is what truly sets them apart. By incorporating cardboard construction tubing as a framing device, Alison and her daughter bring an element of excitement to the DIY experience. The duo carefully arranges favorite rocks and shells within the frames before pouring the cement, allowing for a unique blend of textures and colors.
As the stones take shape, interspersing large river rocks adds depth and visual interest. For an added touch of luxury, consider incorporating glass jewels to add a dash of sparkle. Visit Alisa Burke Redefine Creativity for a comprehensive guide on how to bring this creative endeavor to life.
Wooden Pallet Walkway
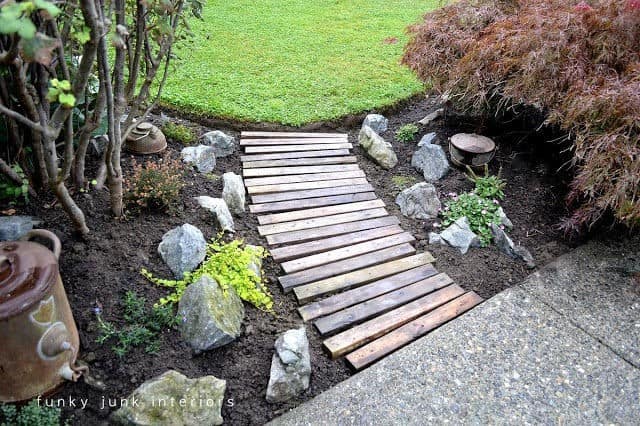
We appreciate this project’s eco-friendly aspect, as it breathes new life into commercial pallets that might otherwise contribute to landfill waste.
To get started, simply follow Donna’s lead: Begin by creating a fresh garden bed with well-raked soil that slopes gently downwards towards the surrounding lawns and driveway. This thoughtful design ensures that you can lay the wooden pallet boards – cut to uniform lengths for a seamless look – at the perfect depth.
nThe beauty of this DIY approach lies in its versatility: Donna recommends leaving the boards loose, allowing for effortless weeding and repositioning as needed. Alternatively, consider adding a pea gravel path beneath your pallet board walkway for an added layer of visual appeal. For a comprehensive guide to bringing this project to life, look no further than Funky Junk Interiors.
Pebble Mosaic Stepping Stones
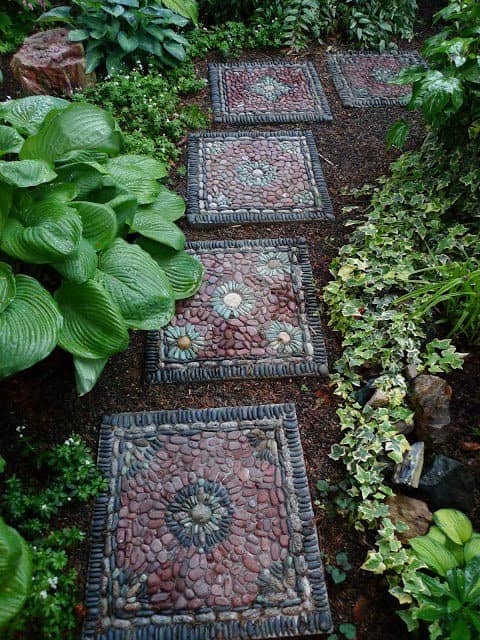
We appreciate the attention to detail that goes into designing patterns on these stepping stones and walkways. The process begins with carefully sorting pebbles by color and shape. To create intricate designs, Jeffrey suggests first envisioning the pattern before pressing the stones into mortar within wooden frames. For a diverse selection of colors and textures, consider sourcing materials from beaches, rivers, or commercial rock yards.
As Jeffrey notes, finding beauty in rocks may require patience and a meditative approach, especially when searching through dusty stone yards. To achieve professional-looking results, break down your project into smaller manageable steps, focusing on one stepping stone at a time.
Wood-Slice Pathway
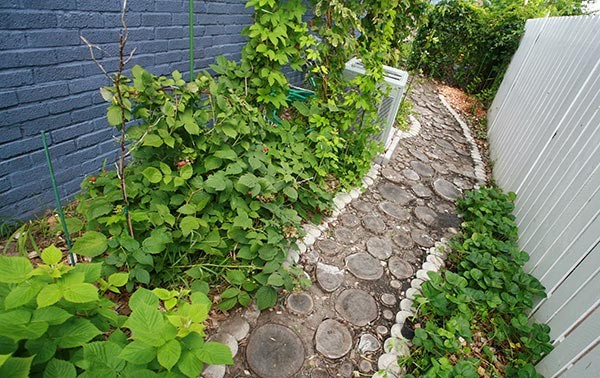
We appreciate this eco-friendly pathway because it was born out of necessity – Marie and Porter had to recycle a tree felled by a tornado. The path now winds its way through their side yard, thanks to some creative problem-solving.
To replicate this DIY project, you can start by removing sod from the area where you’ll be creating your path. Next, create a level soil surface and define it with concrete edging pavers.
Then, cut the fallen tree into 3-inch-deep rounds of wood and place them in a random pattern along the path. Fill in any gaps with smaller rounds and finally, add soil to create a smooth walkway.
One final touch we suggest is adding some decorative flair by using smooth river rocks to cobble the edges of your path. This will not only add visual interest but also help define the pathway.
For more detailed instructions on how to bring this unique feature to your own yard, visit Celebration Generation.
Countertop Scrap Path
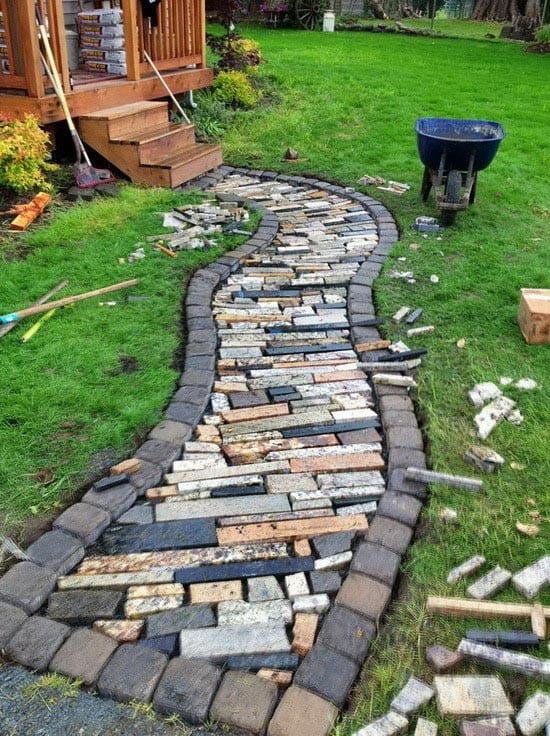
We’re captivated by this unique pathway because it’s created by the diverse shapes and colors of granite remnants. The varied hues bring a pop of color to an otherwise ordinary path. To create your own DIY masterpiece, start by acquiring a load of granite countertop remnants at an affordable price, according to Remove and Replace. Begin by removing the sod from your chosen pathway area and leveling it with gravel. Install concrete edging along both sides of the path to provide definition.
Next, apply mortar to the gravel path and then press the granite pieces into place. Once the mortar has dried, seal the remnants and finish off the path by applying grout between the stones. Our recommendation is to add shallow borders on either side of the path to accommodate short flowering perennials. This will not only enhance the visual appeal but also create a sense of depth and dimension. For more detailed instructions, refer to Remove and Replace’s comprehensive guide.
Whimsical Mosaic Patio Path
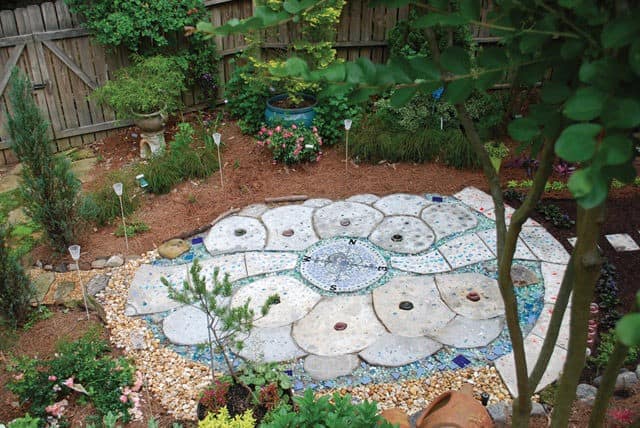
We adore this design because it’s not just a patio, but an invitation to explore and discover the beauty that lies beyond. The swirls of pavers emanate from a central compass rose, guiding us on a journey through a pathway that ultimately leads to the garden. To recreate this masterpiece, start by sketching out your design plan, deciding which shapes you want to combine for the patio’s edge. Next, use a rope to define the patio’s perimeter and then remove or kill the surrounding grass.
With the area prepared, outline the paver shapes using spray paint, starting with a central circle. To make the process easier, water the ground overnight to soften it before digging narrow trenches for the cardboard frames that will support the concrete forming the pavers. Build the patio one paver at a time, laying out your pattern of mosaic materials next to each paver before pouring and troweling in the concrete.
Once the pavers are dry – typically within 24 hours – you can start adding the finishing touches, like pebbles and other decorative elements. Keep in mind that it will take a few days for the concrete to cure before you can add furniture. Our advice? Create a construction calendar before starting your project to help keep everything on track.
Sidewalk Stairway Path for Slopes
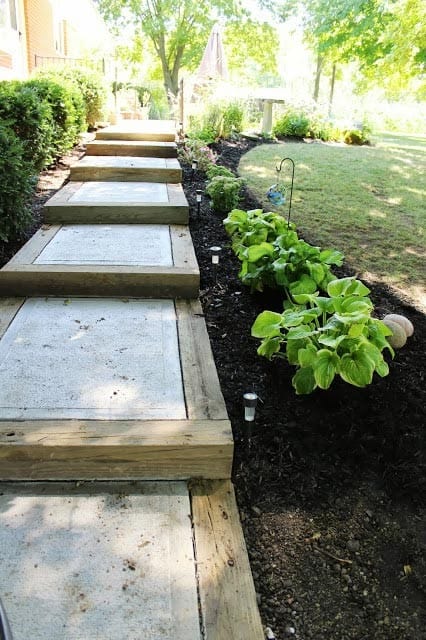
Creating a charming and functional pathway up a slope can be achieved through a clever DIY approach. This elegant solution involves building a series of gently rising steps that lead from the garden-level garage to the first-floor entry of the home. To get started, measure the rise over run – the ultimate height of the path and the distance it travels – to calculate the length, rise, and number of steps. The depth of the beams used in this project will determine the depth of each step.
In Elizabeth’s case, she framed the slabs with discarded pressure-treated beams. The frames are then secured to the ground using rebar, after which a layer of limestone gravel is placed as the concrete underlayment. At this point, it may be helpful to bring in a contractor to pour the concrete. Finding inexpensive sources for salvaged timbers can also make the project more affordable. For instance, Elizabeth’s son worked in construction and provided her with the beams she used.
Alternatively, you can search online or contact local construction companies to find suitable materials. Lastly, don’t underestimate the value of seeking inspiration from walks around your neighborhood or other communities. Keep an eye out for elements of hardscape that you would enjoy having in your own yard and snap a photo on your smartphone to reference later.
Mosaic Garden Path

This captivating garden pathway weaves together the beauty of nature and human ingenuity, presenting a visually stunning mosaic of stones and lush foliage. As you meander along the winding path, the harmonious blend of hardscaping and softscaping creates an immersive experience that invites exploration and admiration. The transformation is nothing short of magical, taking what was once a simple journey to the patio and elevating it into a true work of art.